When it comes to quilting, my favorite part is creating the designs. To make a quilt design that is representational and not merely a geometric design, many people opt to use applique or paper piecing techniques. I am not a fan or either of those methods. I prefer the traditional piecing technique of measuring and cutting pieces and sewing them together. In this article I will demonstrate the process I use to create my patterns.
These are the steps I use to create my quilt block designs:
Start with a subject.
Draw out the design.
Fill in some fabric or color to see how it looks.
Figure out how to break things down into patches easy to sew together.
Draw the design on grid paper and determine letter names and measurements for the patches.
Make the quilt block.
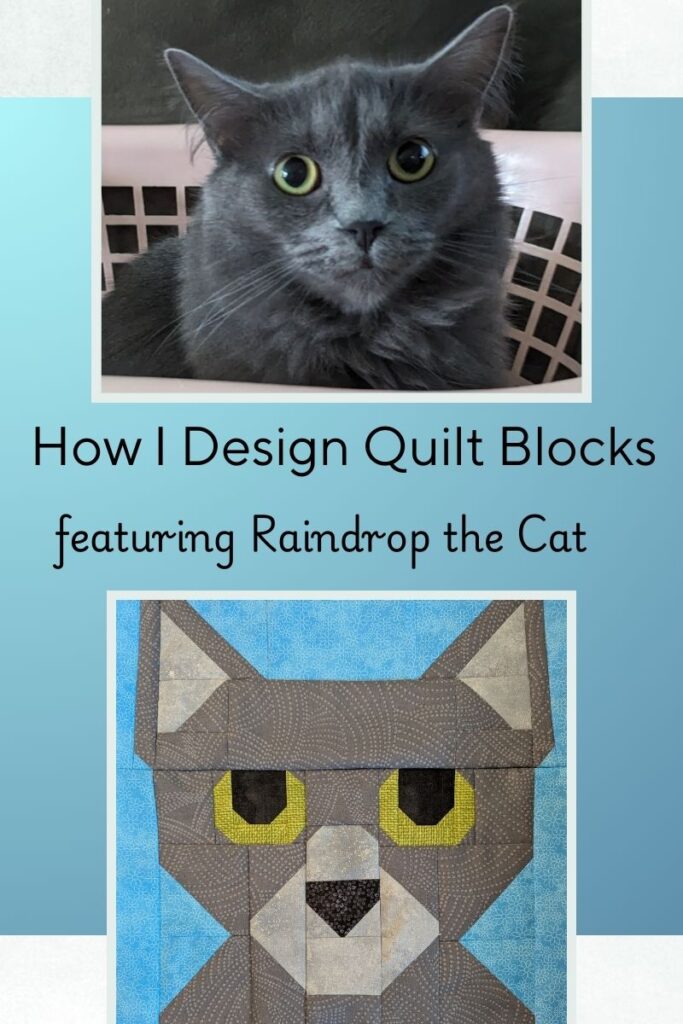
Start with a Subject
Meet Raindrop. She is a sweet-tempered gray cat. She is relatively friendly to humans, but as the firstborn of our four pets, she is not a fan of the other animals in the home. She is a skilled mouse hunter and an excellent therapy cat. Whenever she hears anyone cry, she will be right there to check on them and comfort them.
Raindrop is now five years old. She was just a kitten when I first started my quilt design business. This is one of my earliest attempts at designing my own quilt patterns. I have grown a lot in my design and sewing skills over the past few years.
Draw out the Design
I usually create my designs on a 24 x 24 grid. Each square can represent as small as ¼” or as large as 1” to range from a 6” x 6” to 24” x 24”. I can draw anything along the lines of the grids or on a 45-degree angle. This makes it easy to calculate the sizes of the pieces and measure and cut them.
Fill in Color and Refine the Design
When I first started designing, I drew my ideas out on graph paper. Now I use my Electric Quilt Software. This allows me to make lots of changes and tweak things as I go. I can put different versions of the design next to each other and compare them until I get something I am satisfied with. In the image below, you can see the progression of Raindrop from an early sketch to the final design.
Break down the pattern into easy to sew patches
Once I have a design I like, I need to figure out how to divide up the larger areas into basic squares and rectangles to sew it together keeping in mind everything needs to be sewn in straight lines.
Draw on graph paper and determine measurements
Next, I draw out the design on graph paper and determine the letters for the patches. Starting smallest to largest, anything that covers the same surface area gets the same letter. Drawing the design out by hand allows me a second look at how the patches are divided and will be sewn together. I often make changes as needed.
Cut and assemble the quilt block
This image shows the steps used to make the cat eye. To create the shape, I start with a square for the pupil. I put two squares in the bottom corners and sew on the diagonal. When trimmed and pressed open, they make triangles. Then I sew strips to the bottom and sides to finish the iris of the eye. I finish shaping the eye by putting squares in each corner and sewing on the diagonal again.
This technique is how I shape many of my designs. The last image shows the back. I find it best to iron open the diagonal seams. The rest of the seams are pressed to one side.
This is the final product. I am quite pleased with how it turned out. I probably could tweak it a bit more to look even more like Raindrop, but overall, I think it is a pretty good likeness of my cat. The eyes definitely capture how she looks when she glares at me… even when I slow blink.